Getting Started with BoldTrail Email Marketing
To get started with email marketing in BoldTrail, open the "Smart Campaigns" area within the Marketing tab. This interface allows you to build automated drip campaigns, assign client tasks, and deploy templated emails.
To access Smart Campaigns:
-
Click on the "Marketing" section in the left-hand sidebar.
-
If it isn’t immediately visible, use the "More" dropdown or the search bar to locate it quickly.
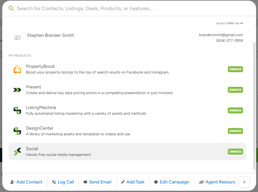
Tip: Use the global search bar at the top of the BoldTrail dashboard to instantly jump to "Edit Campaigns" or any other marketing feature.
1. Adding Campaigns to Contacts
You can add a campaign to your contacts in two main ways: automatically or manually. Automatic assignment is handled through the campaign’s logic section, where you set qualifiers so that contacts are enrolled without any additional work. Manual assignment gives you more control and flexibility, allowing you to assign campaigns either to a single contact or to a group of contacts at once.
(1) Automatically: Automatic assignment happens when you build the logic inside a campaign to filter and qualify contacts. For example, you might set a rule so that all new buyer leads are automatically placed on a 14-day follow-up campaign. Once the campaign is active, BoldTrail will handle the assignment in the background, saving you time and ensuring no contacts are missed.
-
Campaigns are triggered based on rules you define in the Logic section.
-
This ensures campaigns are consistent and applied without manual effort.
(2) Manually: Manual assignment gives you direct control to choose which contacts receive a campaign. This can be done either on an individual basis or in bulk.
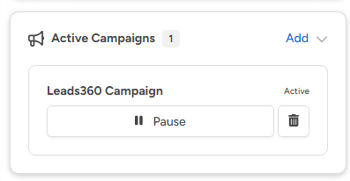
(a) Individually: To add a campaign to just one contact, start by navigating to that contact’s profile. On the right-hand side of the screen, you will see a section called Active Campaigns. Click Add, choose the campaign you’d like to assign, and it will start immediately. This is especially useful if you want to customize the timing or apply a specific campaign to a unique lead.
-
-
Navigate to the contact’s profile and find Active Campaigns.
-
Click Add, select the campaign, and it will begin right away.
-
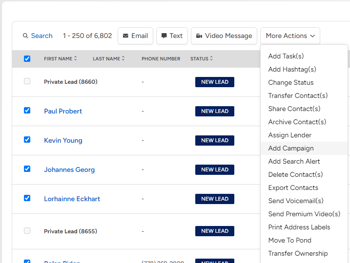
(b) To Multiple Contacts: If you want to add multiple contacts to a campaign at once, you can do this through the Contacts tab. Start by applying filters to sort the contacts you want included—for example, filtering for all your current clients or new leads from the last 30 days. Once the filtered list is displayed, check the small box next to their names to select them. Next, click More Actions, then choose Add Campaign. Finally, select the campaign you want to apply, and it will be assigned to all selected contacts.
-
-
Use filters in the Contacts tab to create a group of contacts.
-
Select the contacts, click More Actions > Add Campaign, and choose your campaign.
-
2. Reviewing, Editing and Custom Smart Campaigns
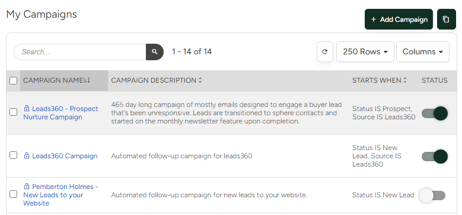
Once you've accessed the Smart Campaigns interface, you'll see a list of available campaigns.
Key features to note:
-
Status Toggle – Located on the far right, this switch controls whether the campaign is active. Green means it's ON; grey means it's OFF. A campaign must be turned ON to apply it to contacts.
-
Campaign Name – Displayed as a clickable blue link. Clicking it takes you to the campaign's overview interface, where you can review its details.
Reviewing a Campaign
The campaign interface provides a complete overview of the campaign's logic, including:
-
Which contact types or triggers initiate the campaign
-
Timing of each step
-
The full list of automated actions: emails, calls, tasks, tags, text messages, webhooks, and videos
While this screen is great for understanding how the campaign works, it does not allow for direct editing.
Note: Pemberton Holmes has created custom campaigns for our agents:
-
New Leads to Your Website – A 26-day sequence meant to engage new website registrants.
-
Prospect Nurture – Triggered if no response is received; it nurtures leads over time with educational content.
-
Newsletters – A monthly campaign with brokerage-written articles, market updates, and local content.
These campaigns have been pre-proofed and optimized for Vancouver Island and our agents.
Personalizing and Custom Campaigns:
If you've reviewed the campaign, you've likely found that there are some specific actions and emails that don't quite fit with your style of business, or there are some areas that you want to edit. Or you just want to create something entirely from scratch. The simplest way to do this is:
(1) Clone the Campaign: Cloning allows you to edit without affecting the original version.
(a) Choose a Start Trigger: Start triggers define when the campaign activates. Common options include:
-
-
-
Lead is New: Activates when someone signs up or is manually added.
-
Hashtag is: Assigns the campaign to contacts with a specific hashtag (e.g., "Victoria Buyers").
-
Contact is Transferred: Triggers when ownership of a contact changes.
- I do not want a start trigger: Allows for manual assignment of the campaign only.
-
-
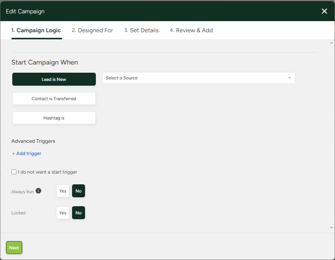
Tip: There are many different qualifiers you can use to trigger a smart campaign. Here is a directory of what each of these do and when you might use them: CLICK HERE
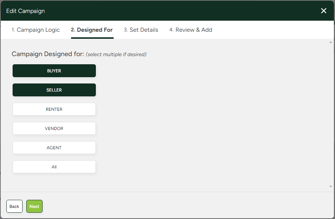
(b) Choose Client Type: Client types include Buyer, Seller, Renter, Vendor, or Other. Default classifications are based on user behavior (e.g., home valuation = Seller). Select "All" if you want no restriction.
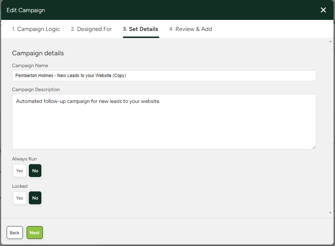
(c) Name and Describe the Campaign: Use a clear, functional name and description so you can quickly locate it later.
(d) Review and Finish: Double-check your settings and click "Finish." You can now fully edit the cloned campaign to fit your workflow.
(2) Edit the Campaign: After cloning, you are free to edit the campaign to match your brand voice, timing, and communication preferences.
Navigate to the Campaign Actions section. From here:
-
Click the Edit button next to any action.
-
Customize the content of emails, texts, or task descriptions.
-
Modify the internal name of the action for your own reference.
-
Update sender and recipient information (e.g., from agent to contact).
-
Adjust the timing of each action (e.g., send immediately, after 1 day, etc.).

Tip: This editing interface allows you to tailor each touchpoint in the campaign, ensuring it aligns with your business tone, cadence, and target audience.
3. Creating and Editing Templates
BoldTrail allows you to create and manage templates for emails, texts, tasks, calls, webhooks, and voicemail drops. Templates can be built from the Templates tab or directly within a campaign you are creating.
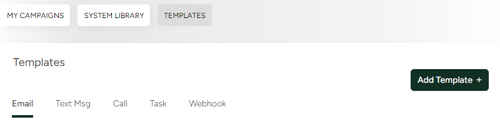
(1) Creating an Email Template: Email templates allow campaigns to automatically send emails to your contacts. These can be either basic or advanced.
(a) Basic Templates: A basic email template is a simple, text-based message designed for straightforward communication. It can include merge tags, such as a contact’s name, to personalize the message, but is limited to essential formatting options. To set one up, start by giving the template a unique name, then define the template scope so admins can control who has access to it (for example, an entire office), and finally, write the email body, adding any merge tags where needed.
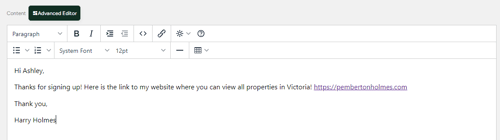
(b) Advanced Templates: An advanced email template allows you to design visually rich, HTML-based emails that can include images, colours, videos, and branded elements for a more professional look. To create one, switch to the Advanced Editor, build your email using the available design tools, and then save it under a unique name for future use.
Tip: For a complete overview on the advanced email builder, follow this link: https://help.insiderealestate.com/en/articles/3332405-boldtrail-advanced-email-editor-overview
Caution: Keep in mind that switching editors will erase any unsaved work, so it’s important to copy and save your content separately before making the switch.
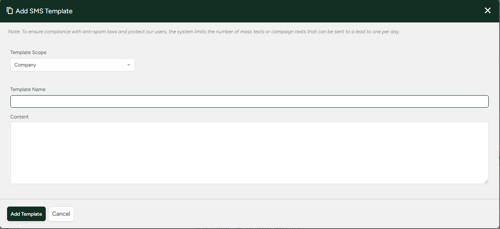
(2) Creating an SMS Template: SMS templates allow BoldTrail to send automated text messages. They are limited to 220 characters (excluding signature and opt-out text) and can only be sent once per lead per day, with campaign texts spaced 24 hours apart.
-
Name the template
-
Write your message, keep it short for better response rates.
(3) Creating a Task Template: Task templates create reminders that appear in your dashboard task list. They include a title, description, and assignment options, either to the contact’s agent or to another agent if chosen by an admin. Assignment happens when adding the task to a campaign, not during creation.
-
Add a name, scope, and title for the task.
-
Provide content describing the task and set who it will be assigned to.
(4) Creating a Call Template: Call templates schedule phone calls within campaigns and display the reason for the call when due.
-
Name the template and define the scope.
-
Add content to explain the purpose of the call.
Tip: Templates can be cloned or edited depending on your needs. Cloning lets you create a copy without changing the original, while inline editing allows quick updates within campaigns. Only templates you created can be deleted or directly edited.
4. Possible Use Cases for Smart Campaigns and Templates
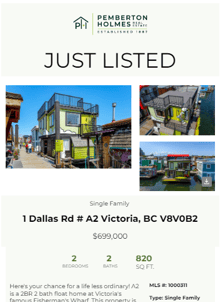
(a) New Listings:
A potential use for Smart Campaigns could be to announce new listings to your contacts. For example, you could set up a series of tasks, promotional emails and text messages to your entire database—or a filtered subset—whenever a property comes to market. This is a quick way to maximize exposure and get early attention for your listings.
Tip: Pemberton Holmes already has a “New Listing” email template available under New Listing – Pemberton Holmes Template. Using the Mass Email function, you can send these out to your entire contact base!
(b) Buyer and Seller Drip Campaigns
You can create nurturing campaigns for buyers and sellers. For instance, buyers can receive educational emails about the purchase process, while sellers can get staging tips, market updates, and reminders about next steps.
(c) Newsletters
Monthly newsletters are a great way to maintain steady contact with your database. Smart campaigns can deliver them automatically on a schedule, whether you use the company-provided templates or create your own.
Tip: There is a custom series of newsletters designed and maintained by your administration staff. You just need to enable and assign the campaign to the contacts you want to receive them.
(d) Birthdays and Anniversaries:
Smart campaigns can be set to trigger around important dates, such as birthdays, home purchase anniversaries, or even annual mortgage check-ins. These can either send automated well-wishes or simply remind you to make a personal phone call.
(e) Open Houses:
Smart campaigns can also help you promote open houses. Beyond sending invitations, you can automatically follow up with attendees by tagging them in the system or using the BoldTrail open house app. Each registrant can receive a personalized email thanking them for attending, along with more details about the home.
Tip: There is a custom open house announcement email for Pemberton Holmes for all agents that can be accessed in either the 'templates', 'mass email' or 'smart campaign' areas.

(f) Post-Transaction Follow-Up
Once a deal has closed, smart campaigns can help you maintain long-term relationships. You could set up touchpoints at 30, 90, and 365 days after completion to check in, provide helpful homeowner tips, or request referrals.
(g) Market Updates
You can send regular market reports—monthly, quarterly, or tailored to neighbourhoods. These campaigns can be automated to different segments of your database based on area or interest.
(h) Seasonal or Holiday Greetings
Smart campaigns can also be used for holiday greetings or seasonal tips (e.g., “Preparing Your Home for Winter” or “Spring Cleaning Checklist”).
That's it from us for now! If you have any questions or need additional support, please feel free to reach out to us at service@phre.ca